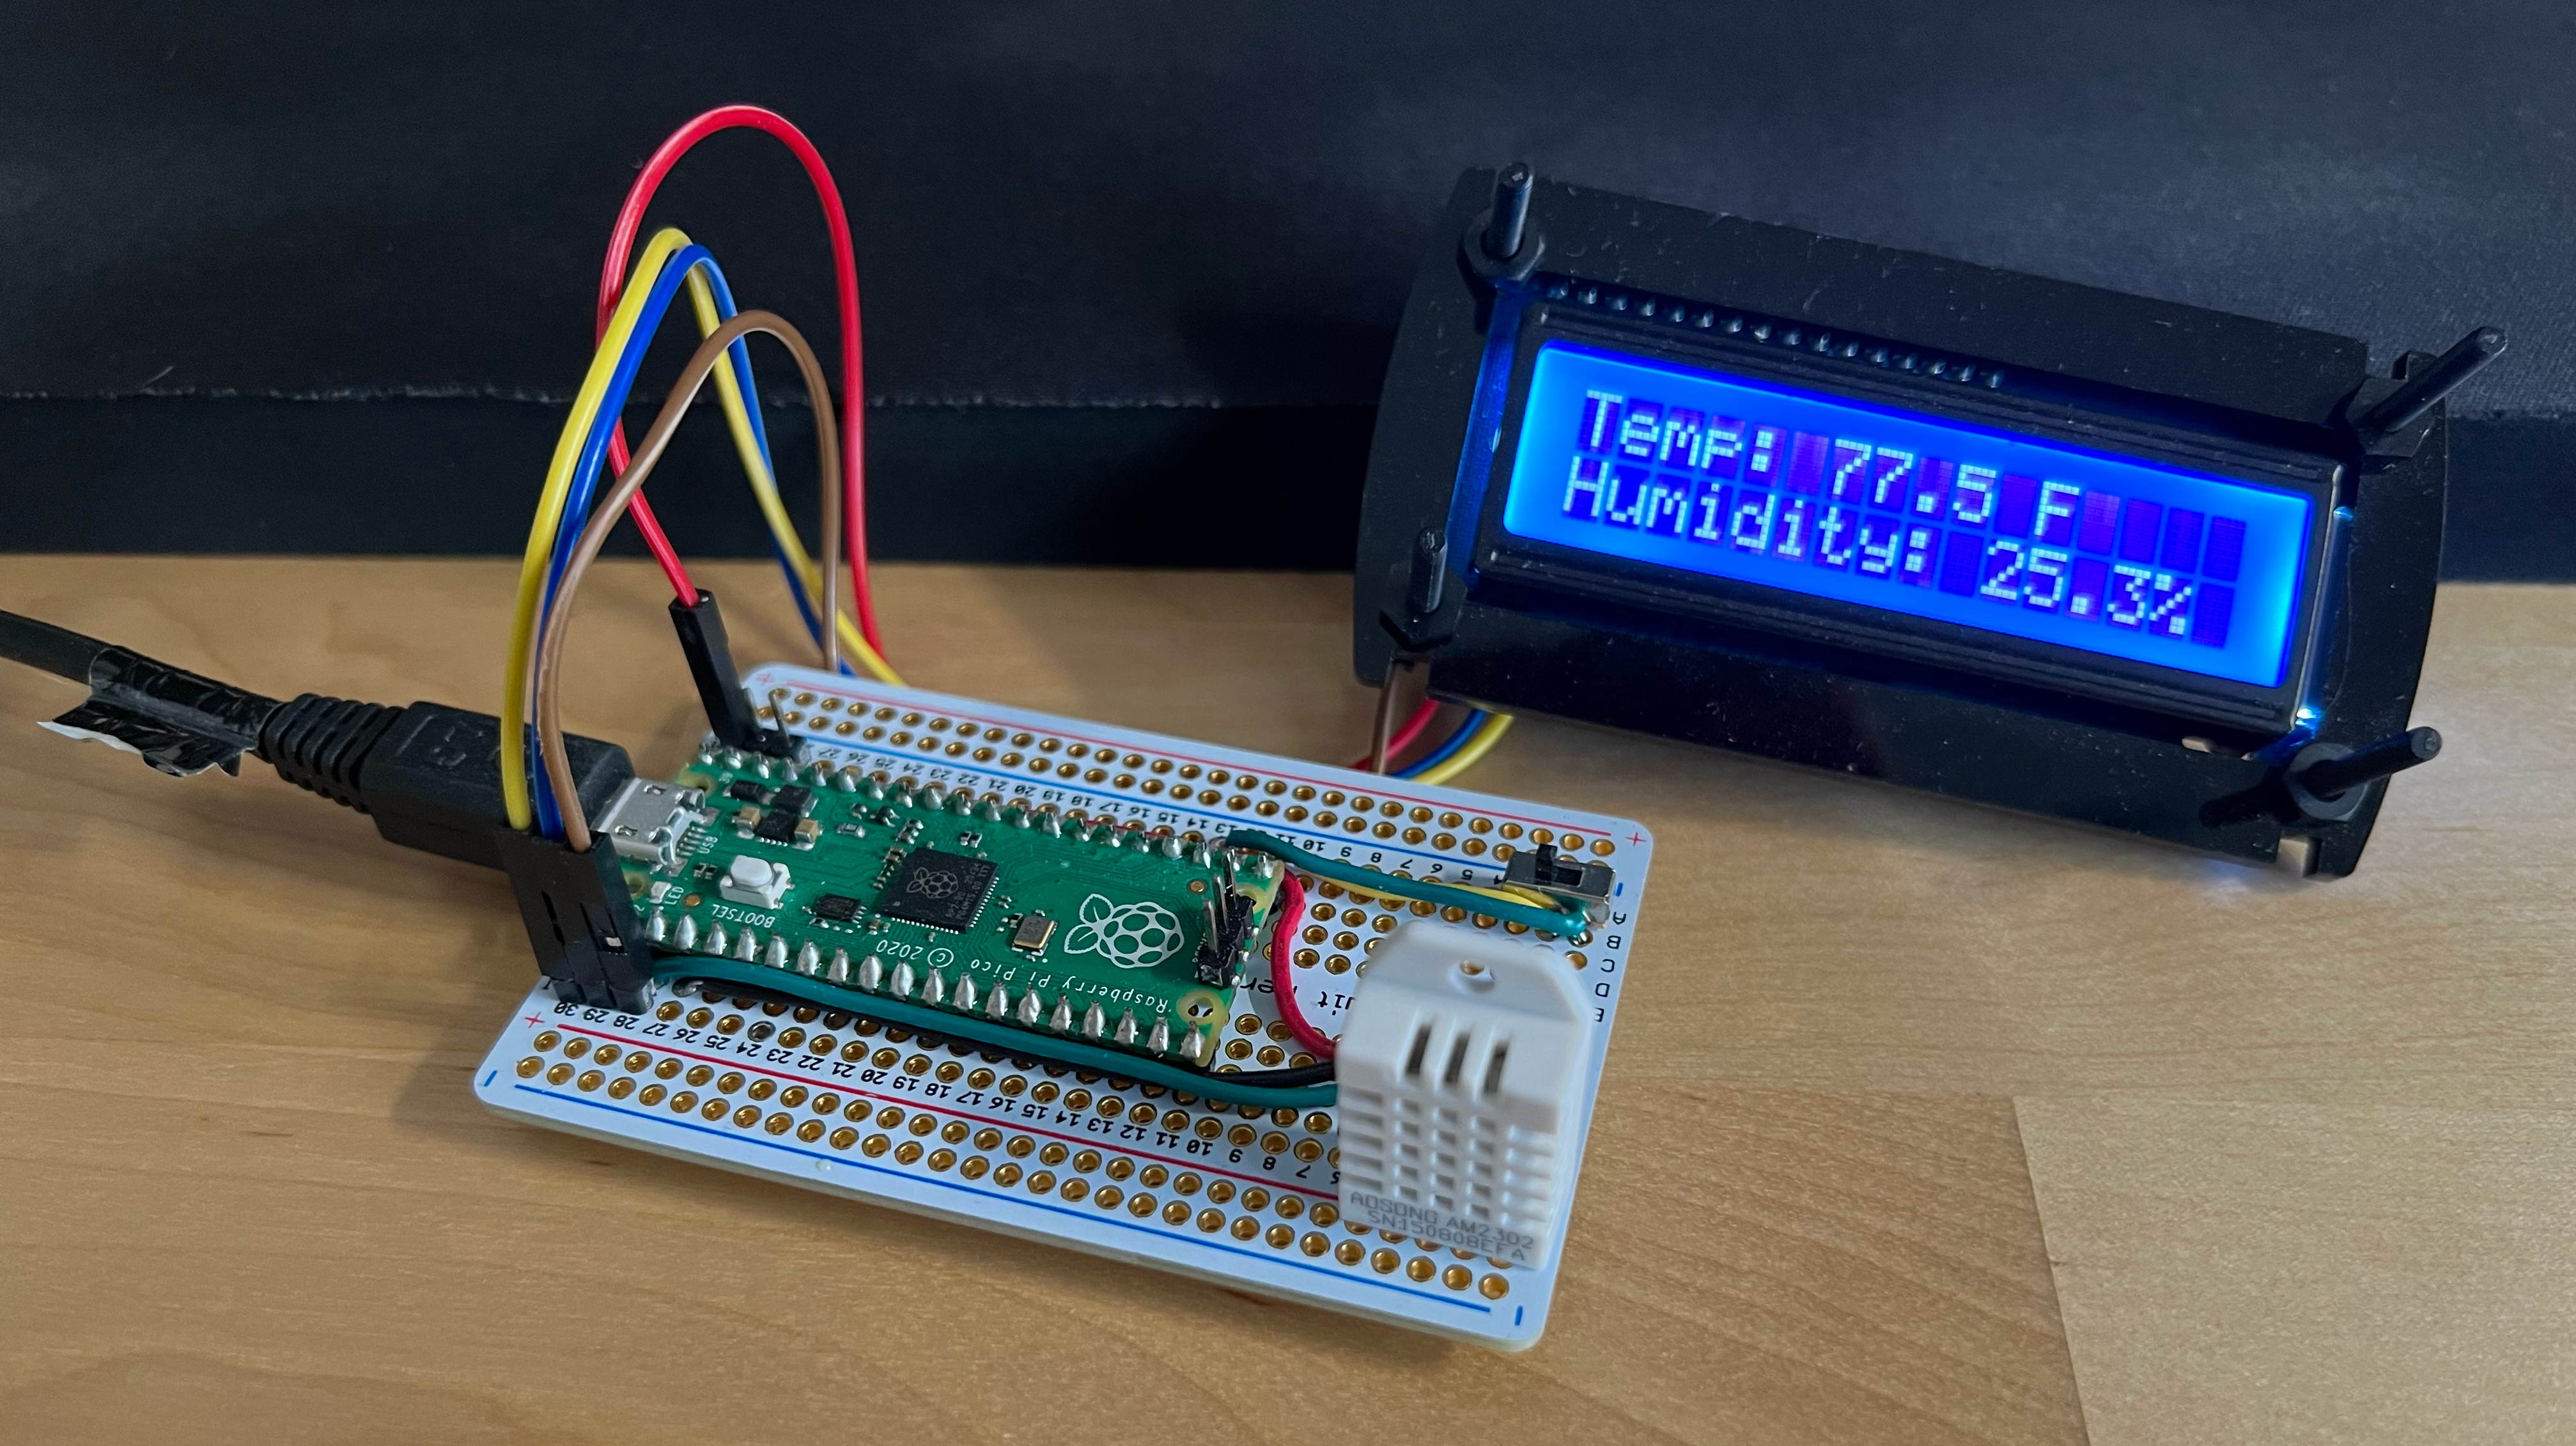
For only $4 I couldn’t pass up the opportunity to tinker with the new(ish) Raspberry Pi Pico!
I had all these parts laying around already, so I decided to create a standalone temperature and humidity sensor.
Parts list:
Here is everything that I used…
- Raspberry Pi Pico RP2040
- DHT-22 Temperature & Humidity Sensor
- 16x2 Character LCD
- i2c character LCD backpack
- SPDT Slide Switch
- Perma-Proto Half-Sized Breadboard
- This can also be done on a breadboard, but I needed some soldering practice so I opted for the Perma-Proto board.
- 16k Resistor
Wiring:
This is how I wired everything together on the Perma-Proto board…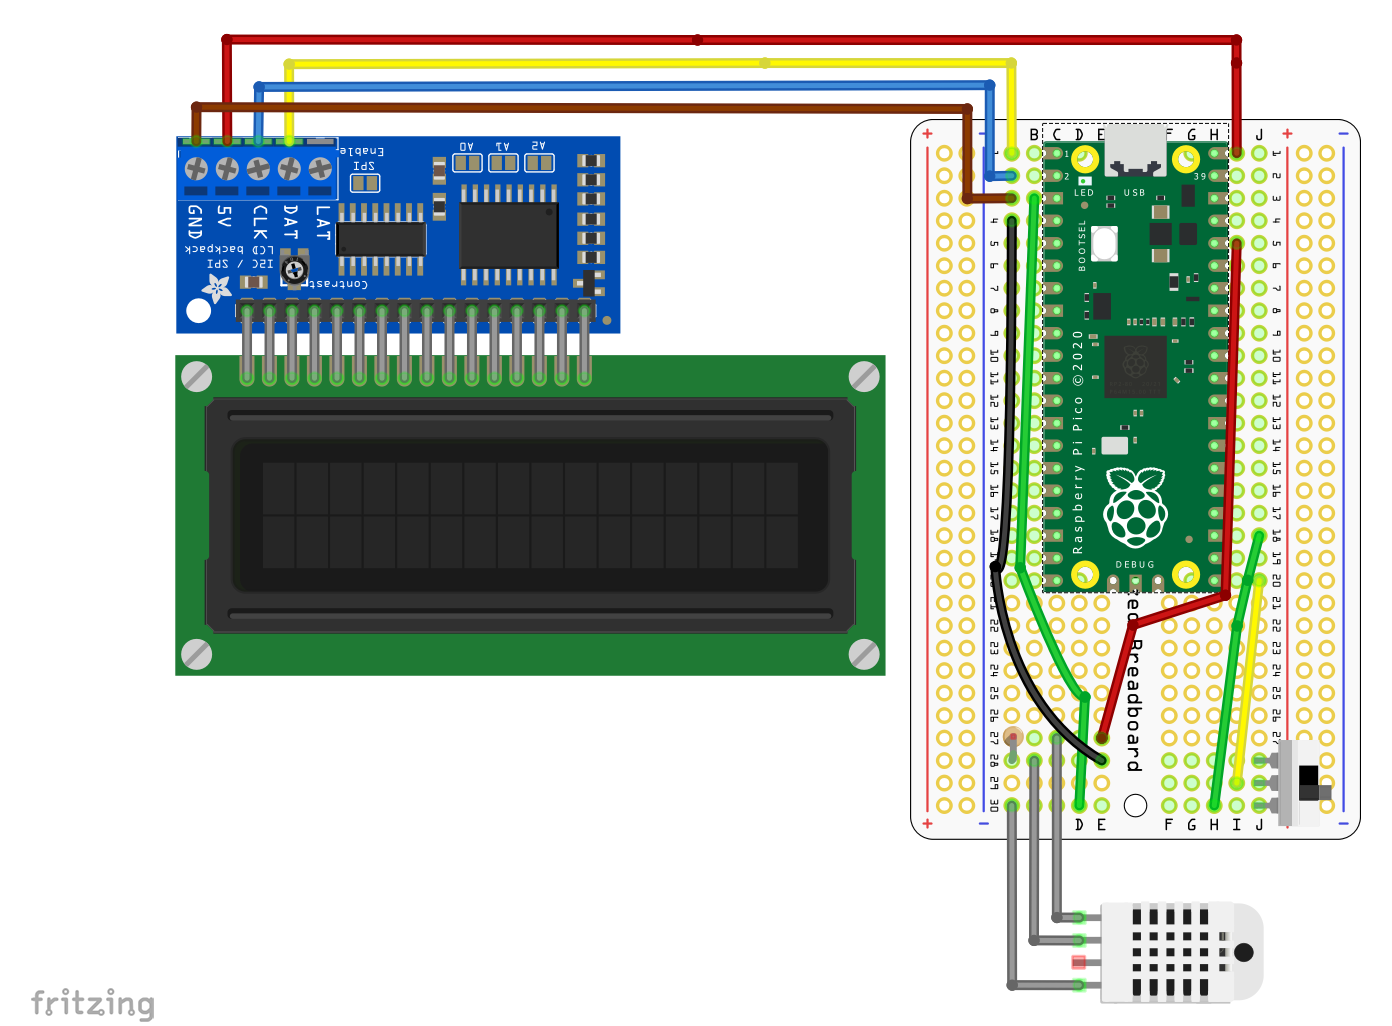
Installing CircuitPython:
Once everything was soldered together, I flashed the Pico with CircuitPython. In order to do this I grabbed a copy of the latest CircuitPython UF2 file. Then I held the BOOTSEL button on the Pico as I plugged it into my PC via USB. This made the Pico appear as a mass storage device. Then I dragged the UF2 onto the Pico and waited a couple of seconds for it to restart.
The Pico mounted as a mass storage device again, but now it had a few more files on it. The only one I cared about was code.py.
Code!
This is the code I ended up using, it’s a hacked together combination of sample code for both the DHT22 and the i2c 16x2 character LCD.
code.py
import time
import board
import busio
import adafruit_character_lcd.character_lcd_i2c as character_lcd
import adafruit_dht
import digitalio
import os
import sys

lcd_columns = 16
lcd_rows = 2

# Initialize I2C bus.
i2c = busio.I2C(board.GP1, board.GP0)

# Initialize the lcd class
lcd = character_lcd.Character_LCD_I2C(i2c, lcd_columns, lcd_rows)
dht = adafruit_dht.DHT22(board.GP2)

# Setup the backlight toggle switch
button1 = digitalio.DigitalInOut(board.GP16)
button1.direction = digitalio.Direction.INPUT
button1.pull = digitalio.Pull.UP

#Turn backlight on
lcd.backlight = True
while True:
    try:
        # Check if the backlight should be on or off
        if button1.value:
            lcd.backlight = True
        else:
            lcd.backlight = False

        # Get the temperature in C
        temperature_c = dht.temperature
        # Convert to Freedom Units
        temperature_f = temperature_c * (9 / 5) + 32
        # Get the humidity
        humidity = dht.humidity

        # Write the results to the character LCD
        lcd.message =
            "Temp: {:.1f} F\nHumidity: {}% ".format(temperature_f, temperature_c, humidity)

    except RuntimeError as error:
        # Errors happen fairly often, DHT's are hard to read, just keep going
        print(error.args[0])
        time.sleep(0.2)
        continue
    except Exception as error:
        # Catch a crazy failure
        dht.exit()
        raise error
    time.sleep(2.2)
Backlight Toggle:
I wired up the slide switch so I can easily toggle the LCD backlight on and off. Each time the loop runs, it checks for the state of the switch, and then sets the state of the backlight. This is somewhat clunky (and also causes a delay when toggling the backlight), but CircuitPython does not support user-written interrupts, so this is the best I could do.
Conclusion:
With this project I achieved what I set out to do, create something useful and learn more about the Raspberry Pi Pico. Hopefully you learned something too!